Showing posts with label paper punch crafts. Show all posts

Sunday, February 17, 2013

a project with a toddler, and a party, and hearts


Some photos from recent weekend activities:

I took a day trip to Cincinnati, where three year old Aven and I created an art project together. Photos below show the process.


 We started out with watercolors, and painted a mostly orange page, a mostly blue page, and a page of whatever she wanted that was not part of the project, to allow her some creative autonomy.


 Aven chose a bird from an assortment of paper punches I had brought with me. I did the punching, this particular punch was too big for her hands.


When Aven counted to twelve birds, we started arranging them.


I used small adhesive squares and positioned them at somewhat-equal distances apart, a few at a time. Aven adhered each bird to the orange paper.


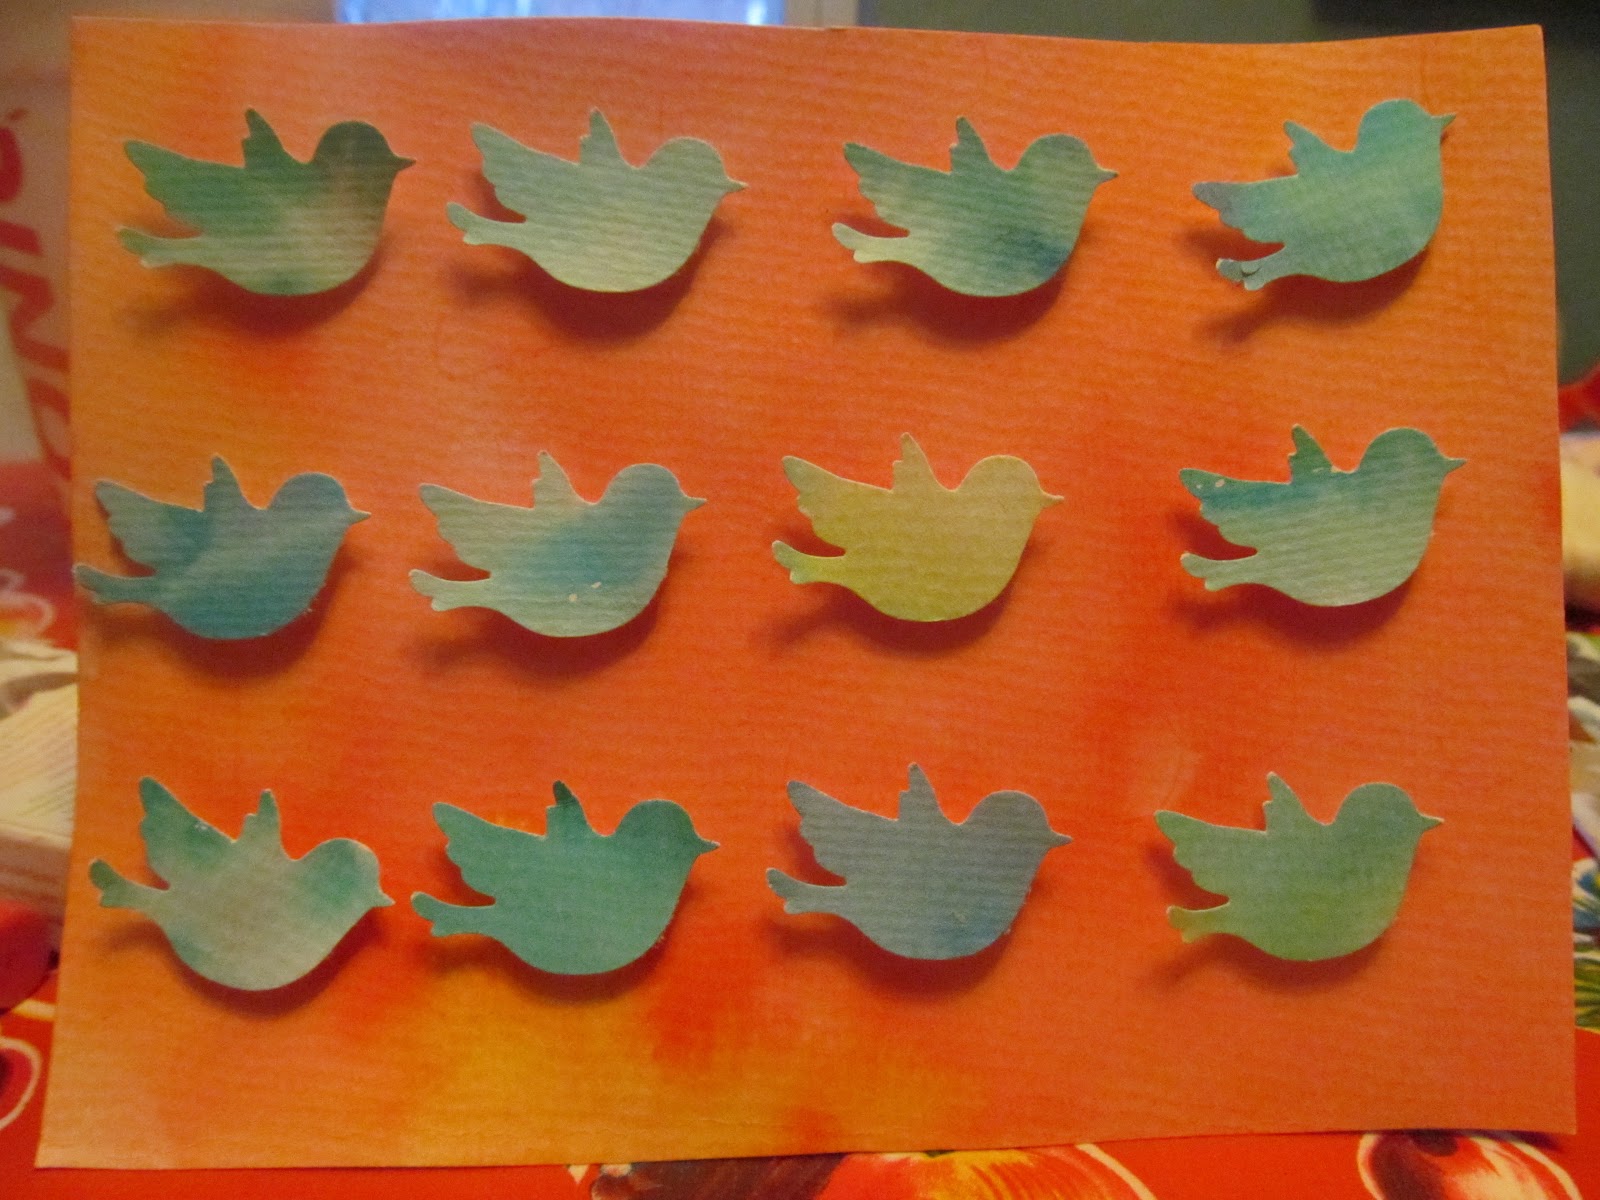
The finished product was simple, colorful, peaceful, and sweet. Aven seemed proud of her accomplishment!

 **************************************


 In January, I went to a surprise party for my friend Nikki, who had no idea! It's fun to prepare for a surprise party, and I think she really enjoyed it.


 For me, the party was a reunion of co-workers past. I have known some of these ladies for ten to thirteen years! It was great to see them again, even if some of them look a little blurry (I promise, they are not blurry in real life).


 I started another unfinished project when I opened up a package of chipboard shapes. I loved painting these Valentine-y embellishments, but I didn't get much farther than this - at least not since that day, maybe I'll start again sometime soon.

 Have a wonderful week!

Monday, September 12, 2011

this is so much fun!


layering these round flowery shapes makes me happy. it's like a culmination of most of what i love about arts and crafts:

*painting (of course)
*doodling
*mixed media
*bright colors
*cutting and gluing/decoupage
*paper punches
*even some glitter

this one would make a splendid blossom, don't you think?

Sunday, December 26, 2010

decoupage letters

i've been waiting to post this for a while! a few of my friends received decoupaged initials (or other items) for Christmas - and here's how they were made:

start with a chipboard letter. you can also start with a wooden letter, or a ceramic letter, or a picture frame, or a mirror, or a papier mache box - you can cover almost any surface at the craft store. i bought these chipboard letters at Hobby Lobby.


i picked out around 10-15 sheets of scrapbook paper for each project. they weren't too matchy, but coordinated in my mind. small patterns work well.


i already had a paper punch. for some of these, i used this scalloped circle from EK Success. for others, i used a pointy circle from Martha Stewart. i like circular shapes for this project. i made sure to punch into the corners of the scrapbook paper to get circles with good right angles. that's much easier than trying to eyeball a perfect right angle.


i cut at least half of the circles. some circles were cut into halves, while some were cut into a large and a tiny piece, until i had a pretty little pile of semi-circles.


i painted the chipboard with regular acrylic paint. it took a few coats to sink in.

decoupage is the next step. curvy borders are tricky. that's why i like the circles with scallops - when glued next to each other, they can fool the eye into thinking there's a straight border.


there is no wrong way to position the shapes. for one project, i started with the borders and worked inward. for another, i started in the center of the letter and worked outward. both had nice results. if i had to recommend one way, i'd suggest laying the borders down (with the cut semi-circles) and working inward.

i use matte mod podge for decoupage projects, in the yellow container. gloss is fine, too, if you prefer it.

i use at least three layers of mod podge:
1. beneath the paper (as a glue)
2. over the paper (to make sure the edges stick down)
3. over the entire project (to even out any uneven parts)

i am very liberal with the mod podge use - but always smooth it out with a flat paintbrush. i also have a separate paintbrush and water jar for mod podge, to keep everything clean and clear.


after the last coat of mod podge, let it dry for a long time. a day is good.


the project can be finished at this point. if you'd like, you can put a sawtooth hanger or some other hardware on the back, so it can be hung on a wall. for the "j", i looped some ribbon and glued it together under a button. i used e-6000 glue, which also needs to dry for a long time.

here is another letter, with a different assortment of papers:


there will definitely be more decoupage in 2011.

Friday, December 24, 2010

gift tags


a few weeks ago i posted about painting index cards and punching shapes out of them. this week i turned the shapes into gift tags (shown above). i'll just write names on them with a marker and tape them to their packages. i think they are pretty (and so simple!).

be careful on the roads if you're travelling tomorrow. it's a good time for hot chocolate!

Saturday, November 20, 2010

happy scrappiness

I don't really scrapbook, and I only make cards by hand a few times a year, so it may seem strange that I have an incredible fondness for paper punches.
This is a glimpse of my collection. I acknowledge that it may be overwhelming.

Here is one of my favorite ways to use them:

1. After I finish painting, my palettes are often covered with tiny dots and shallow pools of unused paint. I paint the excess onto index cards or canvas paper.

2. After I've collected a little assortment of dried, painted papers, I start punching. This punch from Martha Stewart's holiday collection is incredibly adorable, don't you think?

Most of the punch-outs are pretty just as they are:
It's also fun to add painted details:
After just a few minutes, a menagerie develops:
They'll be great to keep on hand for upcoming projects...ideas are abundant!